
How to Adjust Print Speed in Elegoo Slicer
June 19, 2026
Where every print-speed setting lives in ElegooSlicer, what each one does, and how to change speed safely without wrecking quality. Step by step, grounded in the real slicer.
Print speed in ElegooSlicer lives on the Speed tab of the Process settings, on the left side of the screen. The catch: ElegooSlicer opens in a simplified view that hides the Speed tab, so the first step is turning on Advanced mode. Speed is also not one number: ElegooSlicer splits it into a dozen region-specific values, and the slicer always prints at the slowest one that applies to a given move. Here is where each setting is and which ones actually matter.
Where the speed settings are
Look at the Process panel on the left. By default ElegooSlicer shows a simplified set of tabs, Quality, Strength, Support, Multimaterial, Others, with no Speed tab. Turn on the Advanced toggle at the top of the Process panel (next to the Global/Objects switch) and the row expands to include Speed. Click it.
The tab is divided into sections. The two you will touch most are First layer speed and Other layers speed at the top.
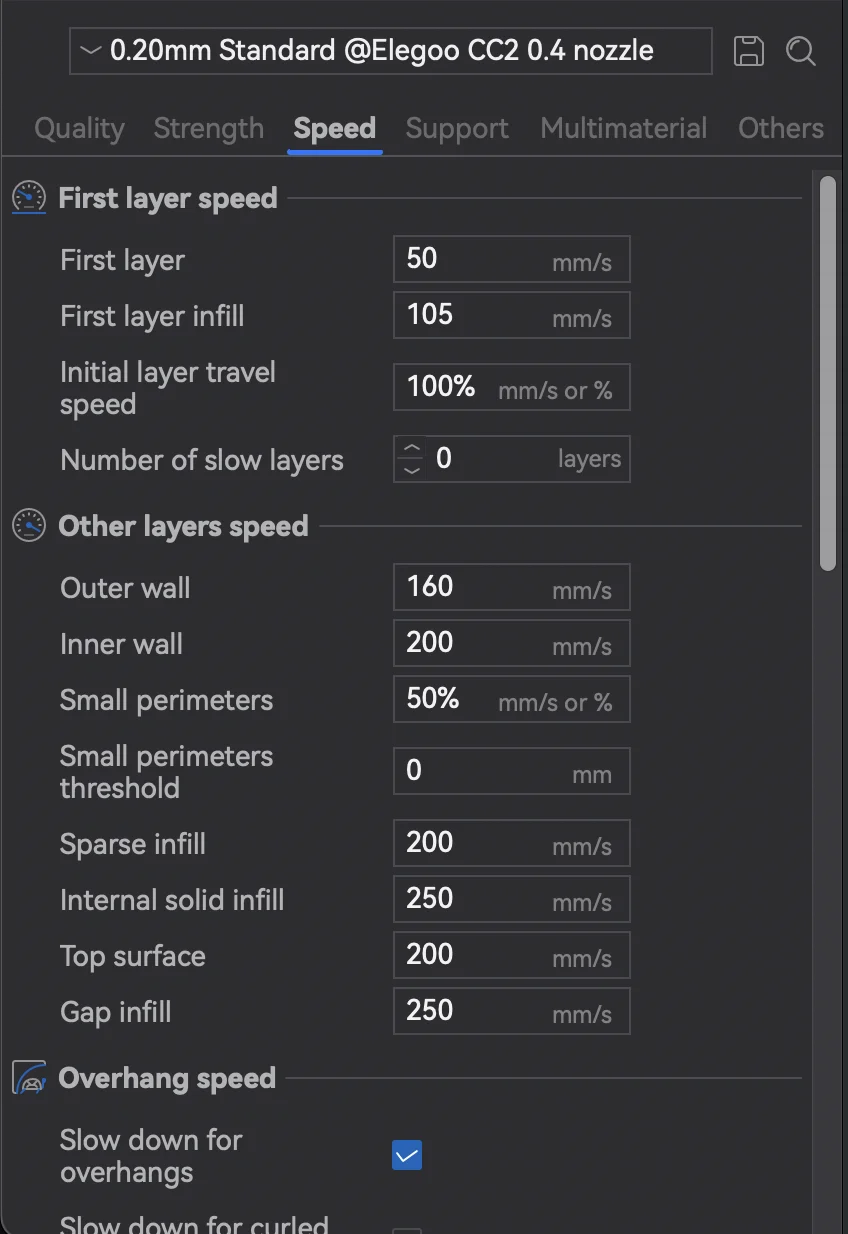
First layer speed
The first layer is printed slow on purpose so it bonds to the bed. These defaults are deliberately conservative:
- First layer (50 mm/s on the Centauri Carbon profile) controls the very first layer's perimeters and infill. Going slower here is the single most reliable fix for poor bed adhesion. Faster risks lifting and warping.
- First layer infill (105 mm/s) is the infill of that first layer, which can run quicker than the walls.
- First layer travel speed (100%) is how fast the nozzle moves between first-layer features.
- Number of slow layers keeps the reduced speed for the first N layers instead of just one, which helps on tall or tippy parts.
If a print is failing in the first millimeter, slow this section down before changing anything else.
Other layers speed
This is the bulk of the print. The important fields:
- Outer wall (160 mm/s on the Centauri Carbon profile) is the speed of the visible outer perimeter. This is the number that most affects surface finish. If you see ringing, ghosting, or rough walls, lower this first.
- Inner wall (200 mm/s) is hidden inside the part, so it can run faster than the outer wall without hurting appearance.
- Small perimeters (50%) deliberately slows tight curves and small holes, where a fast head cannot keep dimensional accuracy.
- Sparse infill, internal solid infill, and top/bottom surface speeds sit just below and trade print time against the strength and finish of those regions.
Set a value in mm/s, or use a percentage where the field allows it (the unit label tells you which is accepted). A percentage is relative to the related base speed, so it scales automatically if you change the headline number.
Travel, acceleration, and jerk
Further down the Speed tab are Travel speed (non-printing moves, safe to keep high) and the Acceleration and Jerk groups. Acceleration governs how aggressively the head changes velocity. On bed-slingers, high acceleration is what actually causes ghosting, so if walls look bad even at a modest outer-wall speed, the acceleration limits are usually the real culprit, not the speed field.
Why your real speed is lower than the number
ElegooSlicer prints each move at the lowest limit that applies to it: the region speed, the acceleration ceiling, and the cooling rules on the Quality and filament tabs (minimum layer time can force the head to slow on small layers so they have time to cool). The speed you read off the sliced toolpath is the combined result of all of those, which is why bumping a single field rarely changes total time as much as you expect.
A faster path for a farm
Tuning speed profiles one machine at a time is fine for a single printer. Across a farm it does not scale: every printer needs the same dialed-in profile applied consistently, and re-slicing by hand for each job is where time disappears. Printago slices in the cloud with the same OrcaSlicer engine ElegooSlicer is built on, so the profile you tune on the desktop is the profile that runs on every machine in the queue. See cloud slicer and print farm slicing for how that fits together, and the ElegooSlicer overview for the rest of the slicer.
Frequently asked questions
Sign up for free today
No credit card required. Connect unlimited printers and get production automation running in minutes.