
Blog
Printago Studio: A Full Slicer in Your Browser
November 17, 2026
Printago Studio is a full slicer in your browser, built into Printago. Open a part, change it, slice with the real Bambu Studio and OrcaSlicer engines, check every layer, then queue it or save it back.
Printago is 3D print farm software that runs production from order to finished print. It works for a side hustle with three printers and for a facility with three hundred. This post covers one release: Printago Studio, what it does, how to use it, and the one thing to get right.
Printago Studio is a full slicer in your browser, built into Printago. Changing one setting on a part used to mean downloading the file, opening a desktop slicer on the one computer with your profiles, and uploading it again. Now every part has Open in Studio, with nothing to install. Every organization has it.
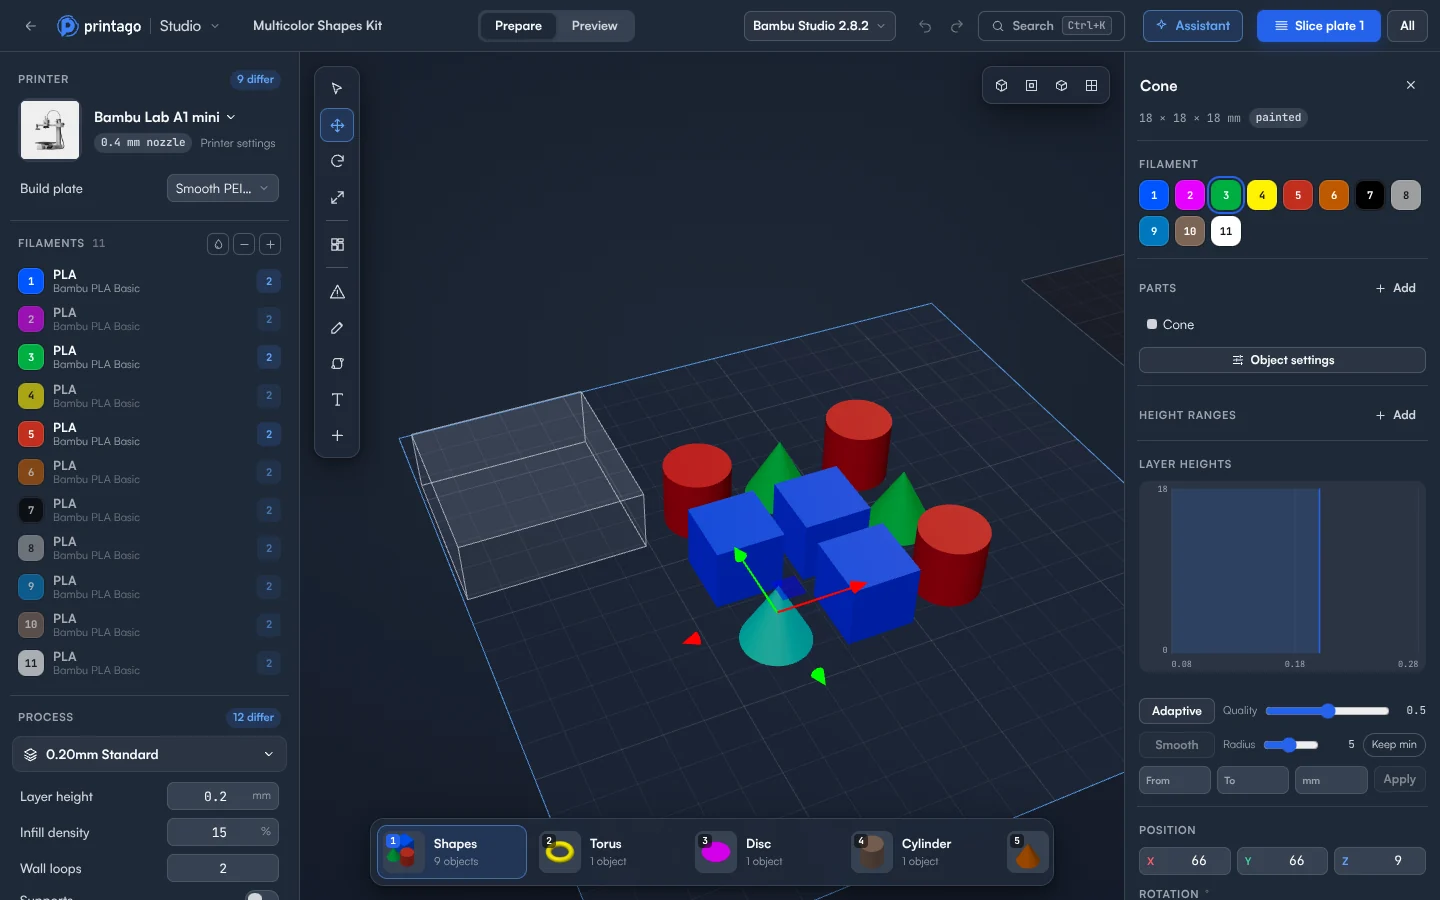
What can I do in Printago Studio?
You can do what you would do in a desktop slicer, on the part where it already lives in Printago.
- Edit like you would on the desktop. Move, rotate, scale and arrange. Change any setting for the whole plate or a single object, and add modifiers, negative parts, and support blockers or enforcers.
- Slice with the real engines. Studio runs unmodified Bambu Studio and OrcaSlicer, with your Printago profiles listed first.
- Check every layer. Preview shows the toolpaths, print time, grams per color, material cost and color changes.
- Print it or keep it. Add to Printago queue prints exactly the G-code you checked, or save your changes back to the part so every future order uses them.
- Ask the assistant. It changes your plate, slices, and checks the result, and every step can be undone.
- Open OpenSCAD and G-code parts. Change an OpenSCAD part's options and the model updates in place. G-code and gcode.3mf parts open straight into their toolpaths.
- Use any device. It runs in any modern browser, including Chromebooks, iPads and phones.
The cloud slicer still slices every queued job on its own. Studio is for when you want to change a part, or see exactly what will print.
How do I open a part in Printago Studio?
Go to Parts, open the part, and click Open in Studio next to the part file.
- Studio opens in place of Printago, already signed in with your Printago account.
- Make your change in Prepare: the printer, the filaments, the process settings, and where each object sits. Every change can be undone.
- Click Slice plate. When the slice is done, Studio switches to Preview.
- Click Add to Printago queue, or choose File > Save to Printago.
To start without a part, click Studio in the sidebar. It offers Open from Printago, Open a local file, New project, and three samples to try.
3MF, STL, OpenSCAD, gcode.3mf and G-code parts open. STEP, CadQuery and build123d parts cannot be opened in Studio yet. The Studio overview has the full list, and Preparing a plate covers every setting.
How do I check a slice before it prints?
Preview shows the sliced plate layer by layer, with its numbers in the right panel: print time, filament in grams, material cost, color changes, and filament use per slot.
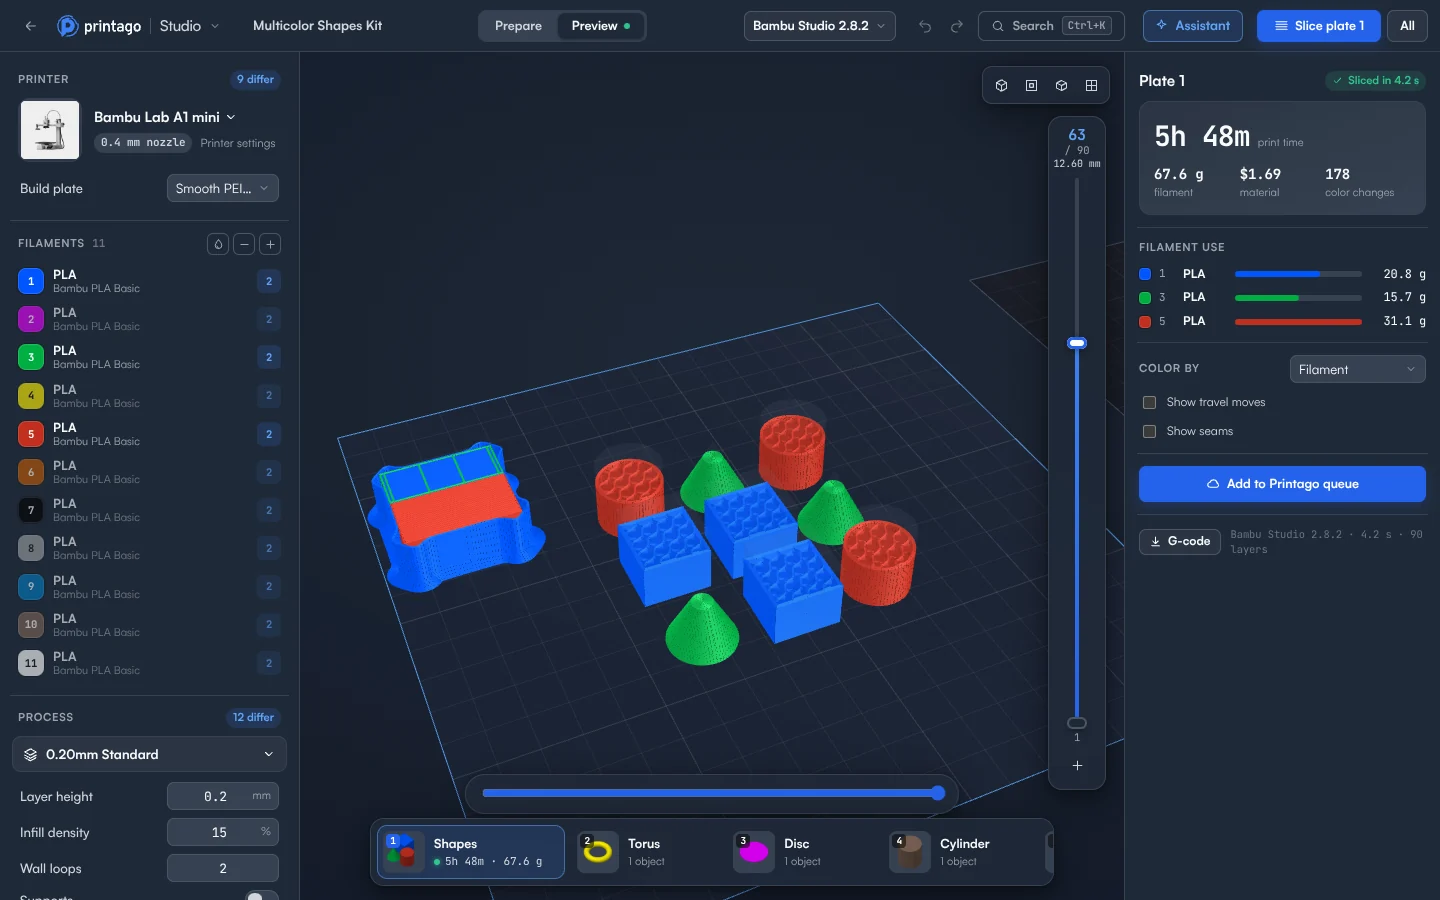
Drag the layer slider to step through the layers. Color by switches the toolpaths between feature, filament, speed, flow, fan, temperature and layer time. To do something before a layer prints, move the slider to that layer, click +, and add a pause, a filament change or your own G-code. Then click Slice again so the G-code includes it.
See Slicing and preview.
What is the difference between Add to Printago queue and Save?
Add to Printago queue prints the plate you checked. Save to Printago changes the part. This is the one thing people get wrong.
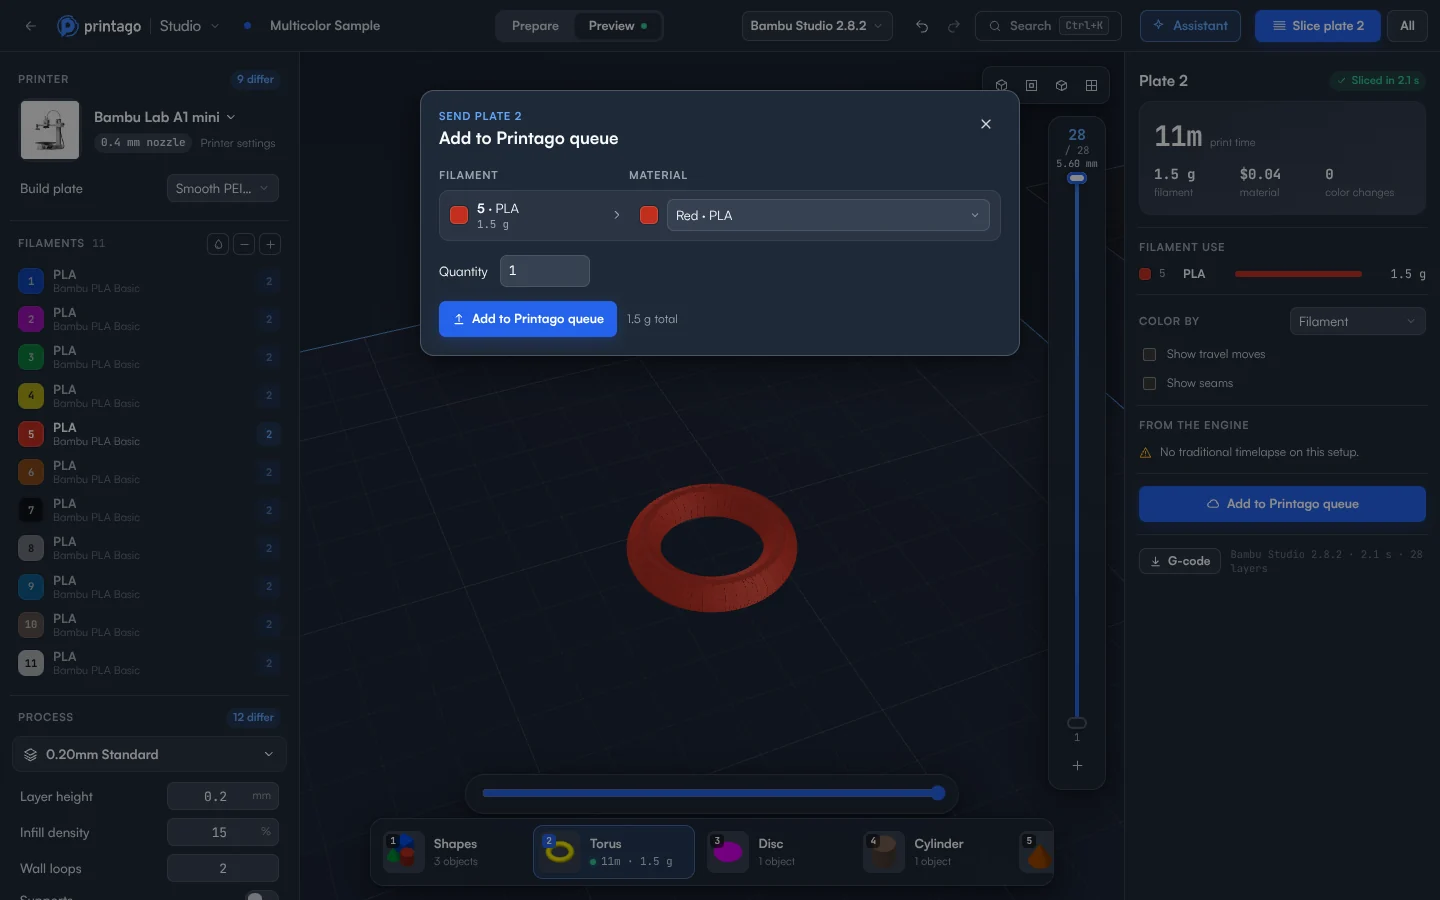
When you add a plate to the queue, you choose a material for each filament and set the quantity. The queue prints the G-code you previewed. Printago does not slice it again, so what you checked is what prints. To do that, Studio creates a new part holding the sliced plate, and two things follow:
- The part you opened does not change.
- The new part is already sliced, so it prints only on the printer model it was sliced for.
To make every future print of the part use your change, choose File > Save to Printago, or press Ctrl+S. For a 3MF or STL part, Save replaces the part's file with the project. For an OpenSCAD part, it keeps the options you chose. A part made of several files cannot be saved back yet; use Save as new part.
You can do both: queue the plate you checked today and save the change for the orders after it. See Adding to the queue and saving.
What does the assistant do?
The assistant works on the open project: it looks at the model, makes the change on the plate, slices, and checks the result. Click Assistant in the top bar and say what you want in plain words.
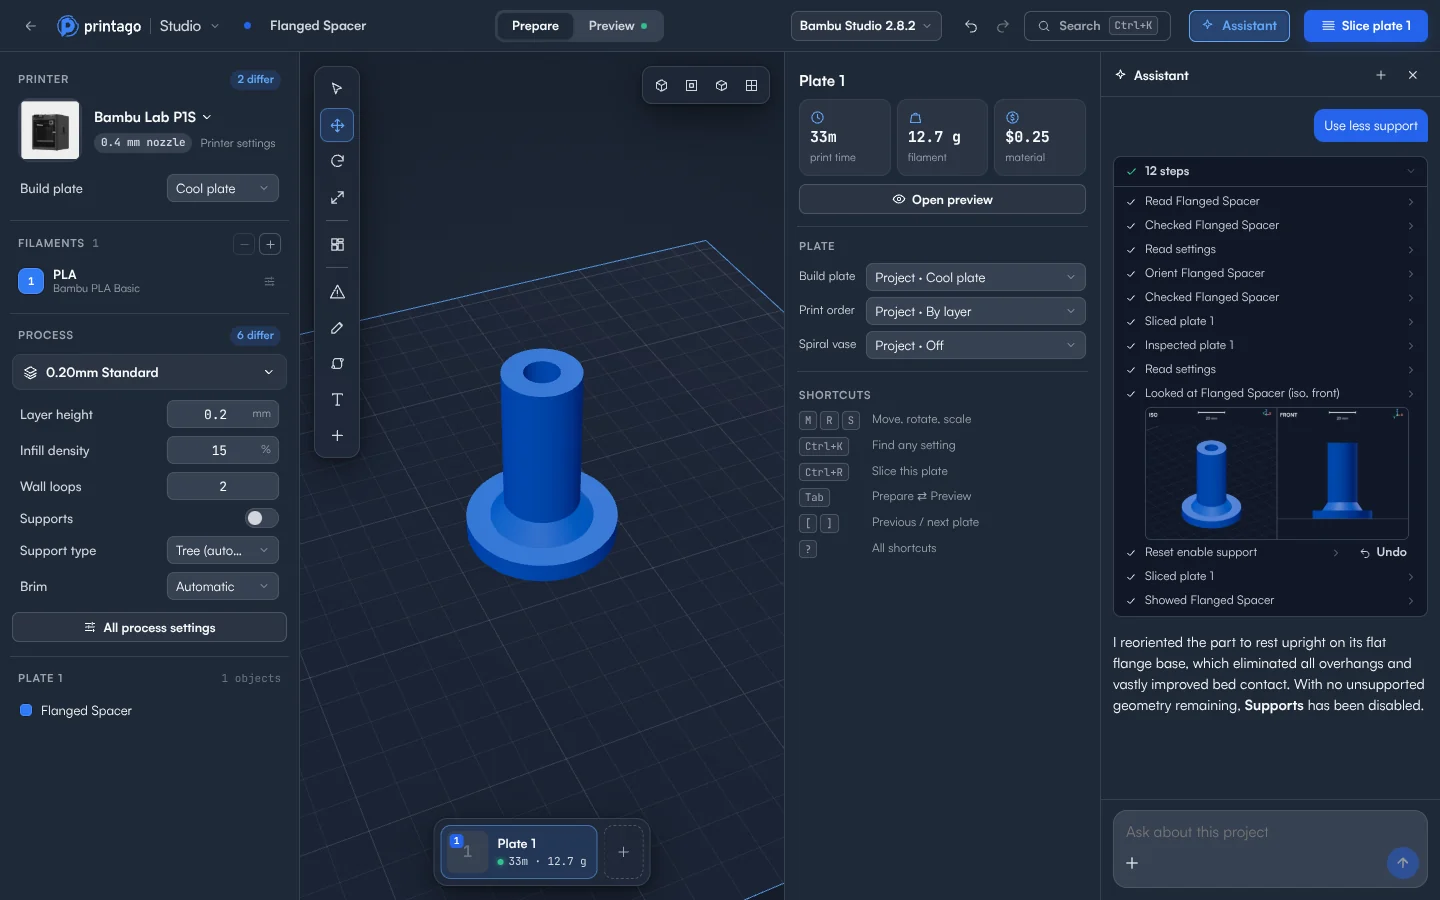
An empty chat suggests what fits the plate, such as Will this print well?, Use less support and Print failed?, which asks for a photo of the print. Every change shows on the plate as it happens and is its own step in Undo. Check its work in Preview before you print.
It has a daily allowance, and the slices it runs count toward your slicing and rendering time. On a failed print, treat its answer as a strong lead: the same photo can get different explanations. See the assistant docs and the assistant page.
Can I open OpenSCAD and G-code parts?
Yes. An OpenSCAD part opens with Options at the top of the Setup panel. Change one, like the name on a keychain, and the model updates in place, rendered with the same OpenSCAD and libraries Printago uses when it prints the part.
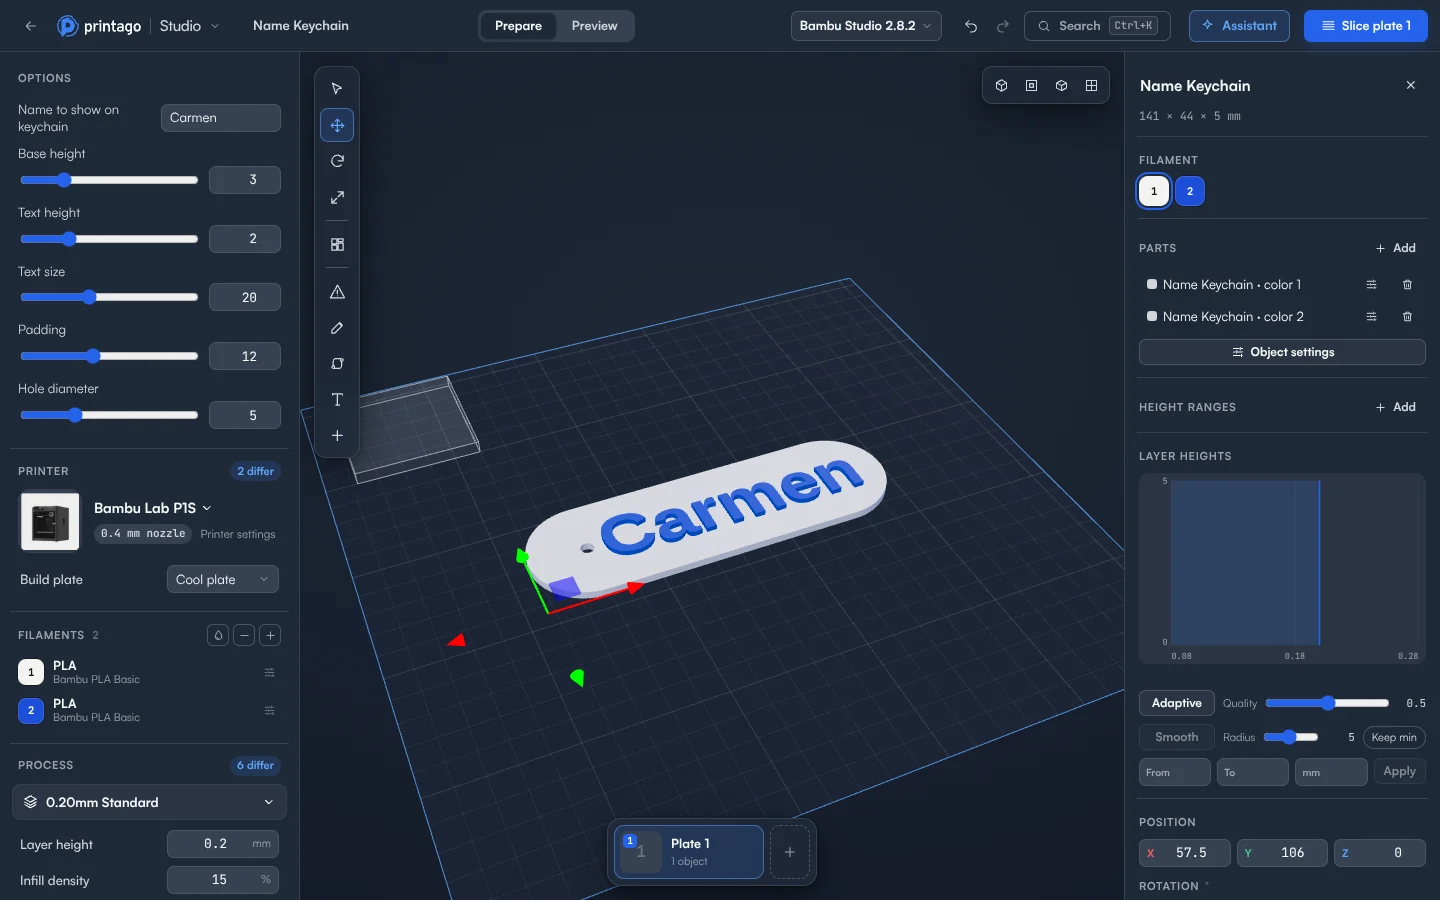
G-code and gcode.3mf parts open straight into Preview, with the print time and filament the file states, so you can check a sliced file before it runs. A plain G-code file has no models, so it cannot be arranged or sliced again.
See OpenSCAD parts and Viewing sliced files.
Try it
Open any part and click Open in Studio. The Printago Studio page has the overview, the docs have the how, and the release notes are on the changelog.
Frequently asked questions
Sign up for free today
No credit card required. Connect unlimited printers and get production automation running in minutes.