
How to Add Screw Holes, Heat-Set Inserts and Nut Traps to a 3D Print
November 21, 2026
Hole sizes for M2 to M6 screws, heat-set inserts, counterbores, countersinks and nut traps, and how to add them to any STL without CAD.
Printago is 3D print farm software that runs production from order to finished print. It works for a side hustle with three printers and for a facility with three hundred.
Plenty of products need a screw: a wall mount, an enclosure lid, a bracket, a two-part kit. The model often has no holes, or holes sized for someone else's printer, and finding the right size means a datasheet, a test print and a second test print. This guide has the sizes for M2 to M6 hardware and the steps to add them to a model you didn't design.
What size hole does a screw need?
A screw that passes through the part needs a clearance hole. These sizes come from ISO 273, which gives a close, medium and coarse hole for each thread:
| Thread | Tight | Normal | Loose |
|---|---|---|---|
| M2 | 2.2 mm | 2.4 mm | 2.6 mm |
| M2.5 | 2.7 mm | 2.9 mm | 3.1 mm |
| M3 | 3.2 mm | 3.4 mm | 3.6 mm |
| M4 | 4.3 mm | 4.5 mm | 4.8 mm |
| M5 | 5.3 mm | 5.5 mm | 5.8 mm |
| M6 | 6.4 mm | 6.6 mm | 7.0 mm |
Printed holes tend to come out a little small, so start at Normal and adjust after a test print.
What hole does a heat-set insert need?
A heat-set insert is a brass sleeve with a thread inside that you press into the plastic with a soldering iron. It holds far better than a screw threaded into plastic and survives being taken apart again. Use the hole size the insert maker gives, and make the hole about 1 mm deeper than the insert:
| Thread | Hole | Depth |
|---|---|---|
| M2 | 3.2 mm | 4.0 mm |
| M2.5 | 3.6 mm | 5.0 mm |
| M3 | 4.0 mm | 6.7 mm |
| M4 | 5.6 mm | 9.1 mm |
| M5 | 6.4 mm | 10.5 mm |
| M6 | 8.0 mm | 13.7 mm |
These are for the common short inserts. Long or tapered inserts have their own sizes, so check the listing.
Counterbores and countersinks
- Counterbore: a wide, flat-bottomed step at the surface so a socket-head screw sits below it. Make it the head's diameter plus about 1 mm, and the head's height plus 0.3 mm deep. For M3 that is 6.5 mm across and 3.3 mm deep.
- Countersink: a 90° cone at the surface for a flat-head screw. Make it the head's diameter plus about 0.4 mm at the top. For M3 that is about 7.1 mm, and for M4 about 9.4 mm.
Nut traps
A nut trap is a hexagonal pocket that holds a nut so it can't turn. Make it the nut's width across flats plus 0.1 to 0.4 mm, and its height plus 0.2 mm:
| Thread | Nut (across flats × height) | Pocket at a normal fit |
|---|---|---|
| M2 | 4 × 1.6 mm | 4.2 × 1.8 mm |
| M2.5 | 5 × 2 mm | 5.2 × 2.2 mm |
| M3 | 5.5 × 2.4 mm | 5.7 × 2.6 mm |
| M4 | 7 × 3.2 mm | 7.2 × 3.4 mm |
| M5 | 8 × 4.7 mm | 8.2 × 4.9 mm |
| M6 | 10 × 5.2 mm | 10.2 × 5.4 mm |
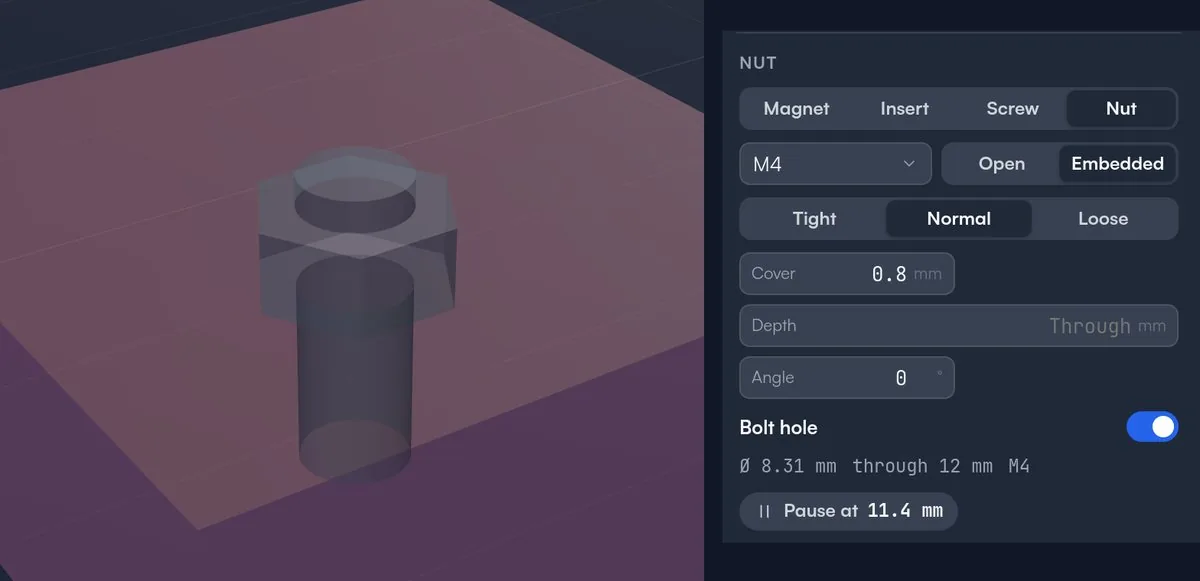
A nut can also be embedded: sealed inside the part, with a pause at the layer that closes it so you can drop it in. It can't fall out or spin, which is useful for parts that get bolted and unbolted.
How do I add screw holes in Bambu Studio or OrcaSlicer?
Both slicers cut holes with negative parts:
- Right-click the model and choose Add Negative Part, then a cylinder.
- Scale it to the hole size from the tables above, and make it longer than the part is thick so it goes all the way through.
- Move it into place and line it up with the face.
- For a counterbore, add a second, wider cylinder at the surface. For a countersink or a nut trap, load a cone or a hexagonal prism you've modeled as a negative part, sized from the tables above.
This works, but each hole is two or three shapes to size and line up by hand, and a hole that's slightly off the face leaves a thin skin that stops the screw.
How do I add screw holes in Printago Studio?
Printago Studio is a full slicer in your browser, built into Printago. Its Features tool knows these sizes.
- Open the part in Studio and press H, or click Features in the tool bar.
- Pick Screw, Insert or Nut, then the thread size from M2 to M6.
- For a screw, pick Plain, Counterbore or Countersink. For a nut, pick Open or Embedded.
- Click the face. Each click adds another hole, so four corner holes are four clicks. Drag a hole to move it.
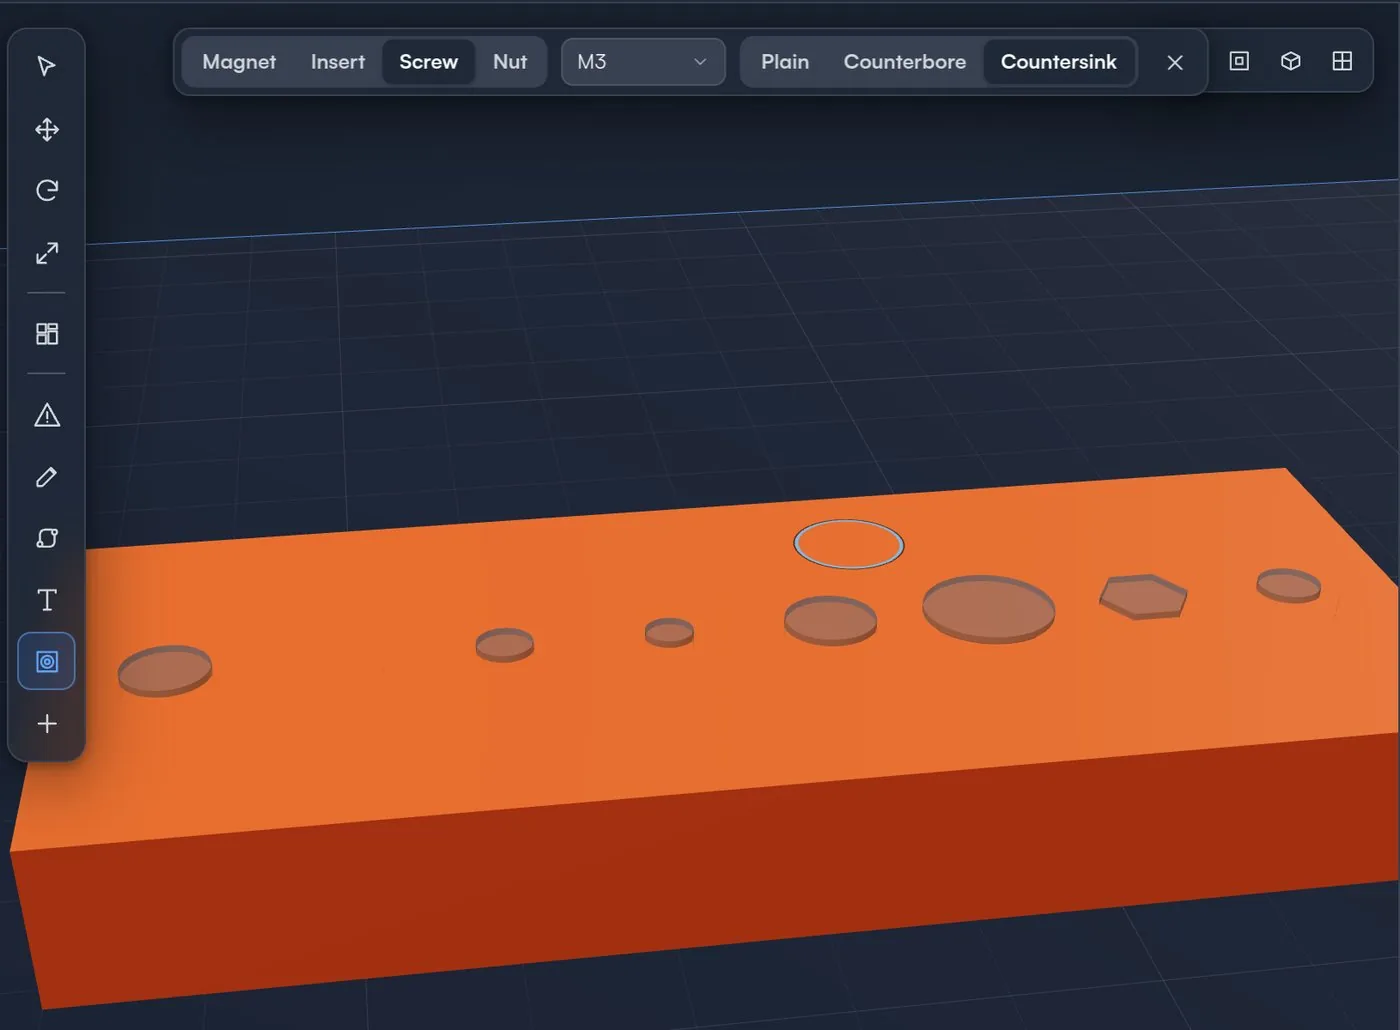
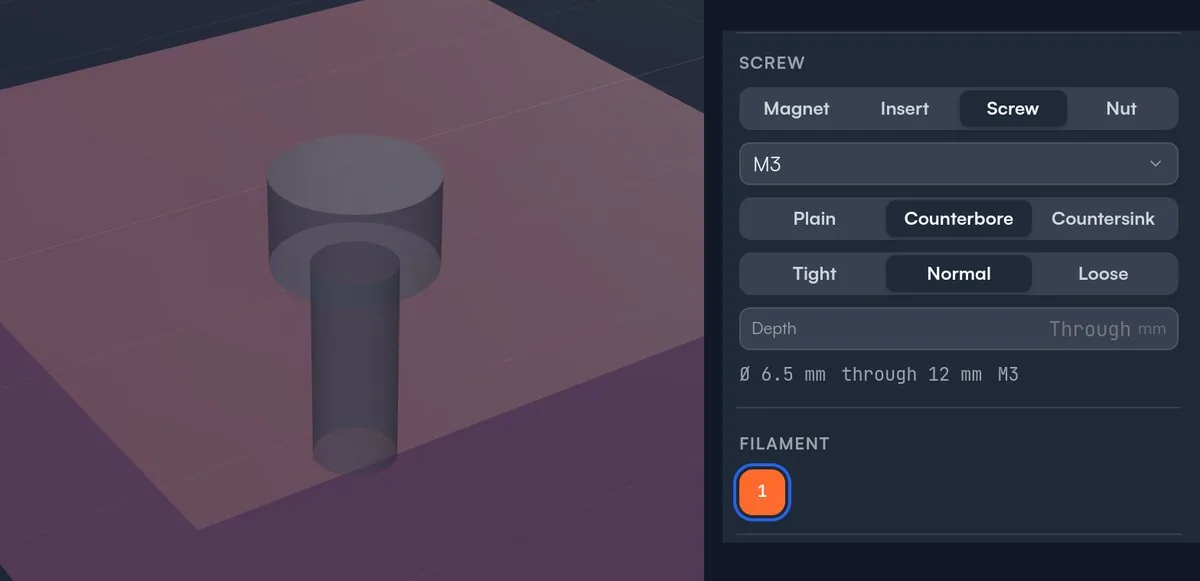
A screw hole goes straight into the face and through the part: Studio measures the material, so the hole reaches the far side and stops there. Type a Depth to stop it short. Tight, Normal and Loose pick the hole size. The panel shows the diameter and depth, so you can check before slicing.
An embedded nut gets the same treatment as an embedded magnet: Studio adds the pause at the layer that closes the pocket and checks that the pocket is sealed.
Each hole is a negative part of the object, so it stays editable. Change M3 to M4 later and the hole updates. Resize the object with Keep features on and the holes keep their size (see how to resize a model without stretching its holes). The Hardware Features docs list every size.
What this lets you sell
Hardware turns a decorative print into a functional product: a mount that screws to a wall, an enclosure that opens for a battery change, a kit that ships flat and bolts together. Those sell for more than the same shape without holes, and they're often the items customers come back for. With the holes a few clicks away and saved on the part in Printago, adding a mounting option to an existing listing doesn't wait on a CAD session.
Try Printago free, or see how to add magnet holes the same way.
More Printago Studio guides
Read the Printago Studio overview, or browse all slicer guides.
Frequently asked questions
Sign up for free today
No credit card required. Connect unlimited printers and get production automation running in minutes.