
How to Add Magnet Holes to a 3D Print, With or Without CAD
November 21, 2026
Add magnet holes to any STL: the right hole size for each magnet, open vs. embedded pockets, and the pause in Bambu Studio, OrcaSlicer and Printago Studio.
Printago is 3D print farm software that runs production from order to finished print. It works for a side hustle with three printers and for a facility with three hundred.
A magnetic version of a product often sells better than the plain one: a box with a magnetic lid, a fridge magnet, a modular organizer that snaps together, a phone mount. The model you bought or downloaded usually has no magnet holes, though, and adding them means guessing a hole size, test printing it, and working out which layer to pause on. This guide gives you the sizes and the steps.
How big should a magnet hole be?
Make the hole the magnet's diameter plus a little room, and 0.2 mm deeper than the magnet is tall. How much room depends on how you want it to fit:
| Fit | Room across | 6×3 mm magnet | 10×3 mm magnet |
|---|---|---|---|
| Tight (press fit) | +0.1 mm | Ø6.1 × 3.2 mm | Ø10.1 × 3.2 mm |
| Normal | +0.2 mm | Ø6.2 × 3.2 mm | Ø10.2 × 3.2 mm |
| Loose (glue it) | +0.4 mm | Ø6.4 × 3.2 mm | Ø10.4 × 3.2 mm |
Printers differ, so print one test hole with your filament before you print fifty. If the magnet falls out, go tighter. If it won't go in, go looser.
Open pocket or embedded magnet?
- Open pocket. The hole is open at the surface. Press or glue the magnet in after printing. The print runs start to finish with nobody at the printer.
- Embedded. The pocket is sealed under a thin layer of plastic. The printer pauses at the layer that would close it, you drop the magnet in, and the print seals it inside. Nothing to glue and nothing visible, but someone has to be there for the pause.
An embedded pocket has to be on a face that points up or down, so it stays open from above until the magnet goes in.
How do I add magnet holes in Bambu Studio or OrcaSlicer?
Both slicers can cut a hole with a negative part:
- Right-click the model and choose Add Negative Part, then a cylinder.
- Scale the cylinder to the magnet's diameter plus the fit, and its height plus 0.2 mm.
- Move it into place. Repeat for every magnet.
For an embedded magnet, sink the cylinder below the surface, slice, and add a pause on the layer slider in Preview at the layer where the pocket gets covered. Our guides cover each step: magnet holes in Bambu Studio and adding a pause in OrcaSlicer.
Getting the pause layer right is the fiddly part. Pause one layer too early and the magnet sits proud of the pocket. Pause too late and the pocket is already closed. Change the layer height later and the pause no longer lines up with the pocket.
How do I add magnet holes in Printago Studio?
Printago Studio is a full slicer in your browser, built into Printago. Its Features tool sizes the hole for you and handles the pause.
- Open the part in Studio and press H, or click Features in the tool bar.
- Pick Magnet and the magnet's size, from 3×2 up to 12×3 mm, or type your own.
- Pick Open or Embedded.
- Click the face where the magnet goes. Each click adds another magnet, so a lid with four corner magnets is four clicks. Drag one to move it.
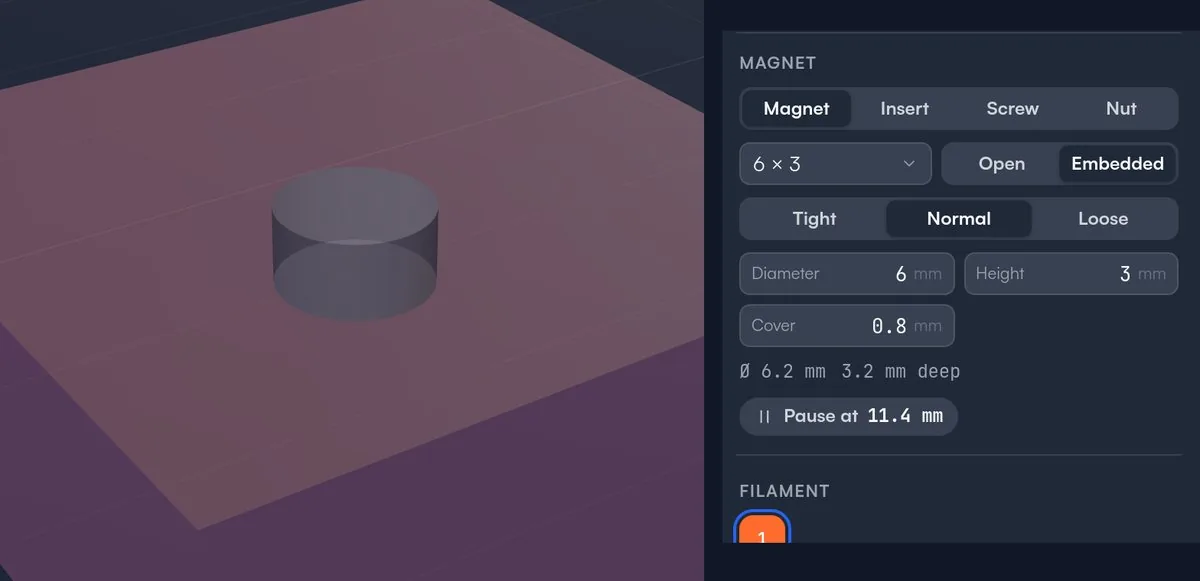
For an embedded magnet, the panel shows Pause at with the height before you slice. Studio adds the pause at the layer that closes the pocket and moves it if you change the layer height. Two magnets that close on the same layer share one pause.
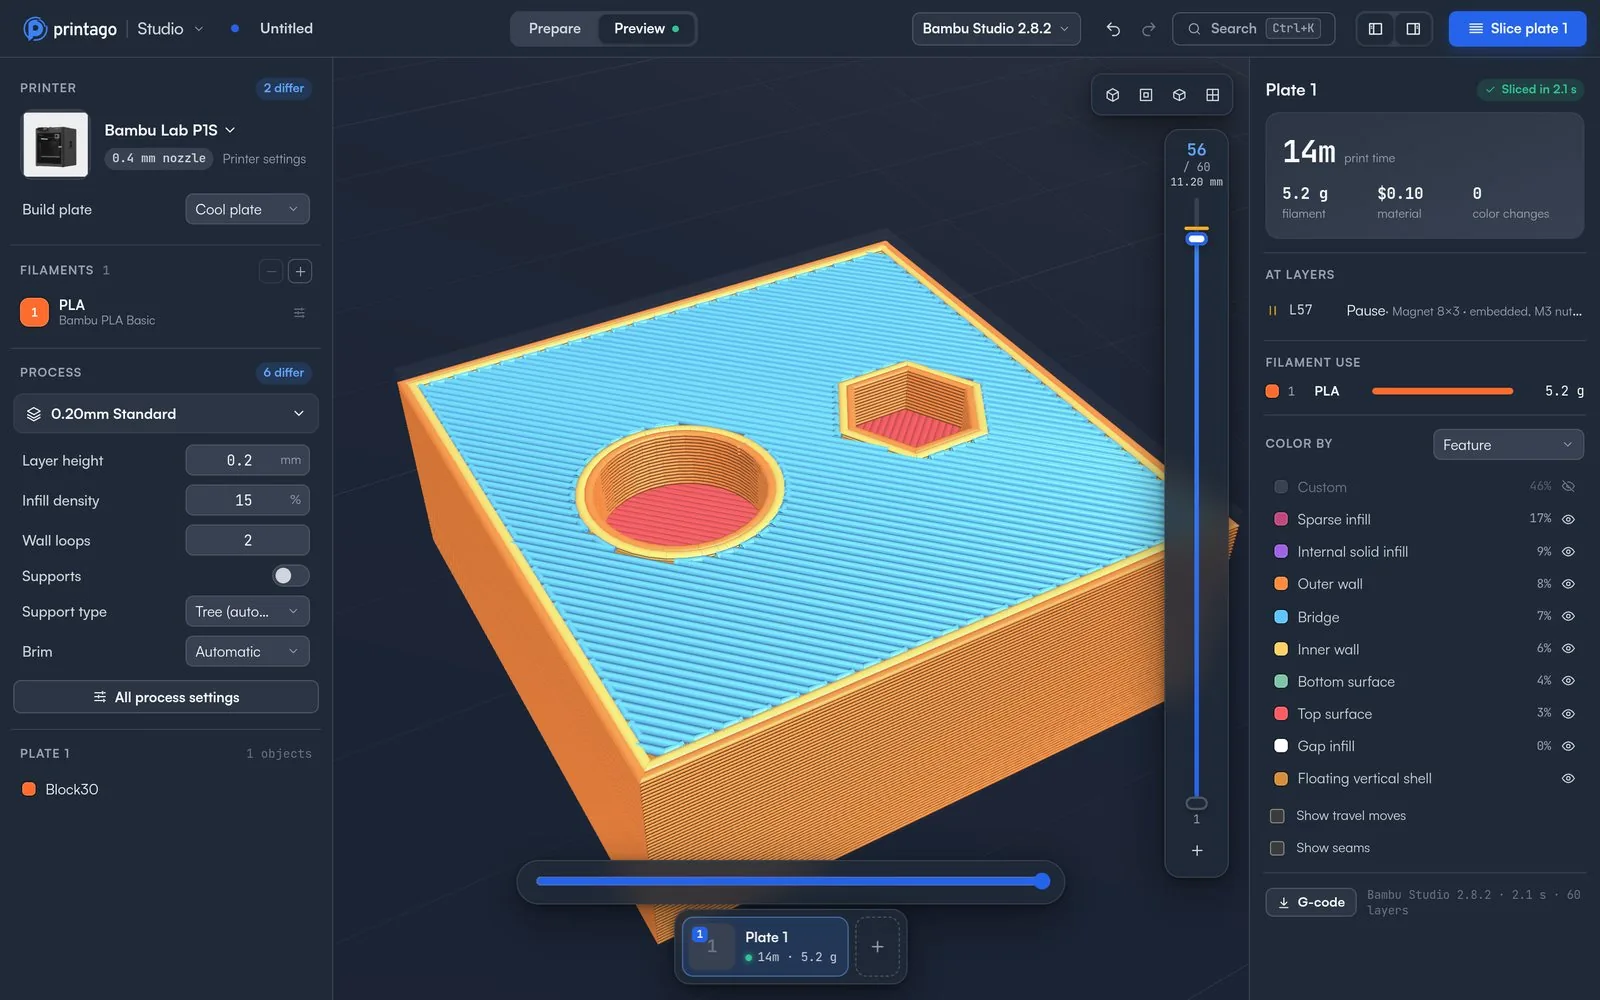
Studio also checks the pocket before it slices:
- An embedded pocket needs 0.3 mm of plastic on every side. One that would break through the side of the model or into another hole isn't added.
- Studio won't slice a plate where a pause can't work, such as one set to print one object at a time, and says what to change.
- If you scale the model, Studio warns that the magnet won't fit any more, and Fix size puts the hole back.
The pause is saved as a normal printer pause, so the file still prints the same if you open it in Bambu Studio or OrcaSlicer. The Hardware Features docs have every size and setting.
Magnets on a print farm
Every embedded magnet is a pause, and every pause is a printer waiting for a person. On a farm, use open pockets for products you make in volume, so the prints run unattended and magnets go in at packing. Keep embedded magnets for the products where a hidden magnet is worth the extra minute.
What this lets you sell
Once a magnet hole is a click instead of a CAD job, any product in your catalog can have a magnetic version: a lid that snaps shut, a sign that sticks to a fridge, organizer pieces that hold together. That's a new listing or a new option on an existing one, from a model you already print. In Printago, save the change to the part and every future order prints with it.
Try Printago free, or read how to add screw holes and heat-set inserts the same way.
More Printago Studio guides
Read the Printago Studio overview, or browse all slicer guides.
Frequently asked questions
Sign up for free today
No credit card required. Connect unlimited printers and get production automation running in minutes.