
How to Resize a 3D Model Without Stretching the Holes
November 21, 2026
Scaling an STL turns screw holes oval. Make a part longer, wider or taller while its holes, corners and text keep their size.
Printago is 3D print farm software that runs production from order to finished print. It works for a side hustle with three printers and for a facility with three hundred.
A customer asks for the wall bracket in a 100 mm version, or the cable tray two slots longer, or the name tag a little wider for a long name. You scale the model, and the screw holes come out oval, the walls get thicker, and the corner radius grows. The screw doesn't fit any more. The usual fix is to open the model in CAD, which you may not have, for a model you may not have designed.
Why does scaling stretch the holes?
Scaling multiplies the whole model by one factor. Scale a bracket from 60 to 90 mm and every hole, wall and fillet grows by 1.5 along that axis too: a 3.4 mm screw hole becomes 5.1 mm wide and stays 3.4 mm tall. In Bambu Studio and OrcaSlicer, the Scale tool and the size fields work this way, with no option to leave the holes alone.
The workaround in a desktop slicer is to cut the model in two with the cut tool, move one half, and fill the gap. That only works when the gap is a simple shape, and the two halves need joining back together before you can print them as one piece.
How do I resize without stretching holes in Printago Studio?
Printago Studio is a full slicer in your browser, built into Printago.
- Open the part in Studio and select the object.
- Under Size in the object panel, turn on Keep features.
- Type the new length in X, Y or Z. A Scale percentage or a drag with the Scale tool works too.
Studio makes the object longer or shorter only through its straight sections: the parts that look the same all along that axis, like a plain wall, a flat foot, or the flat between two holes. Holes, corners, curves, text, and Studio's own magnet and screw features keep their size and their distance from the ends.
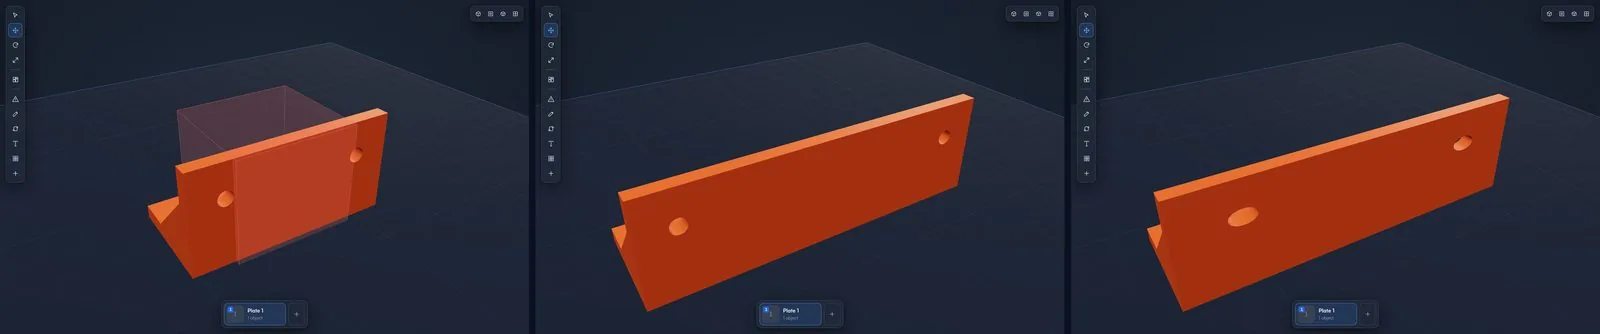
How do I choose where it stretches?
By default the longest straight section takes the change. On a busy part, like a vented panel or a tag full of text, the longest section can be a blank end, and putting all the new length there looks lopsided. So you can pick.
With Keep features on, Stretch at shows a strip for each axis. Each straight section sits at its place along the strip: filled sections stretch, dashed ones stay the same. Tap a section to switch it. The same sections show as bands on the model.
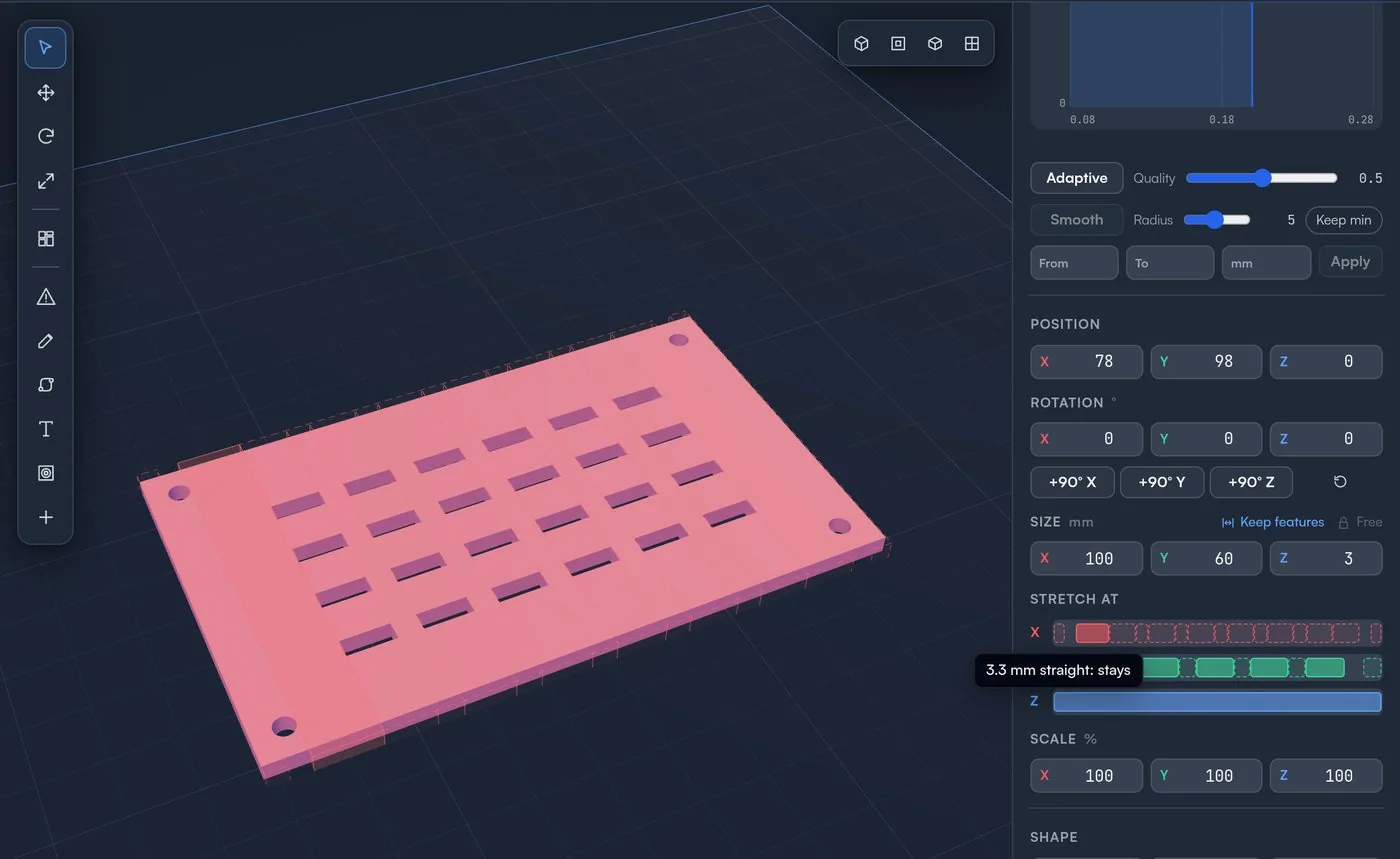
Picked sections share the change in proportion to their length. On this panel, picking the six bars between the slots and typing 140 mm spreads the slots out evenly instead of putting all 40 mm in the left margin:
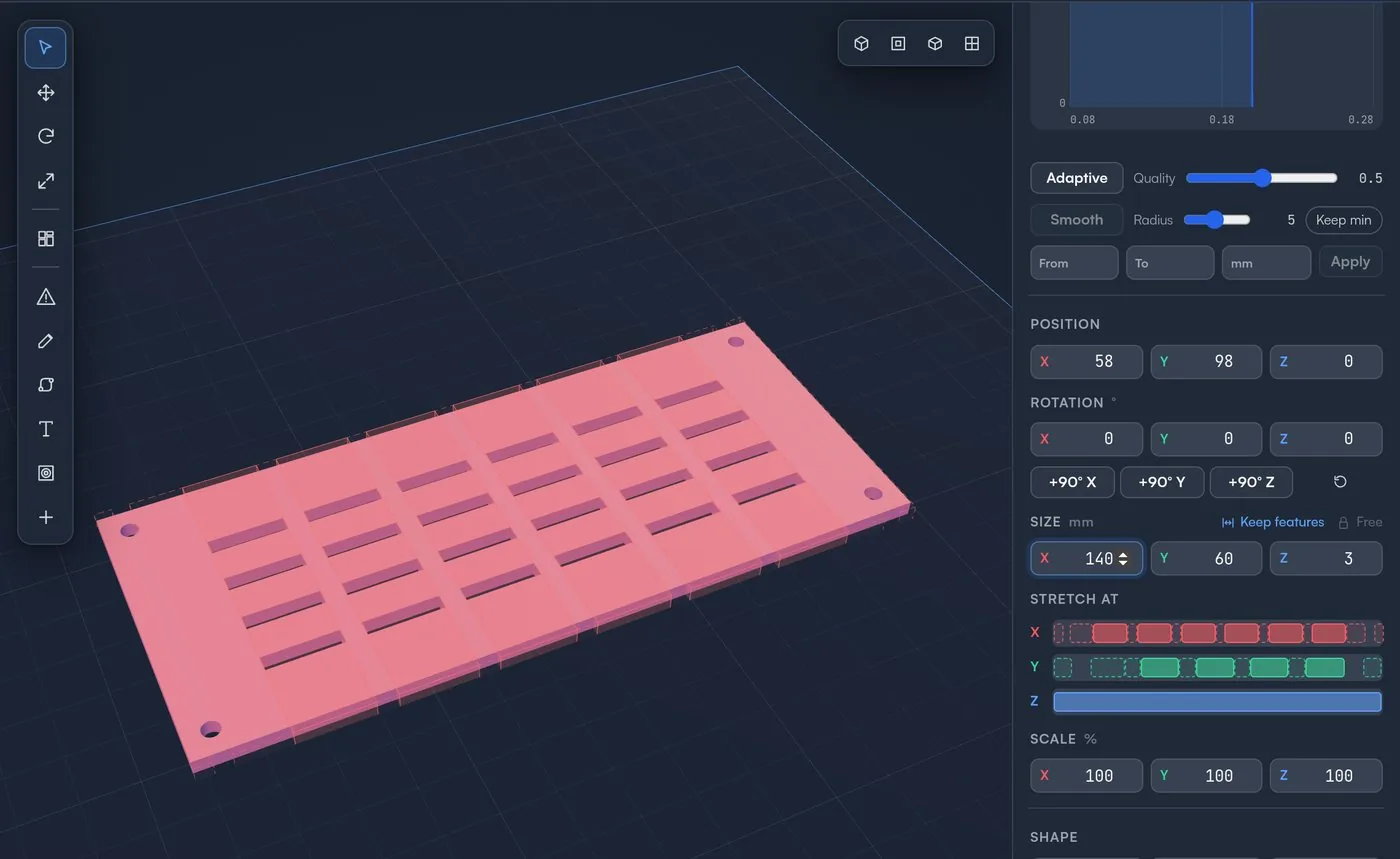
Shortest, next to Stretch at, sets how long a section has to be to get a strip. Raise it to hide narrow sections, such as the inside of a slot, which would widen the slot if it stretched.
When it scales instead
Some shapes have no straight section along an axis: a sphere, a figurine, a hook whose curve spans its whole depth. Studio scales those axes instead and names them under Size before you type.
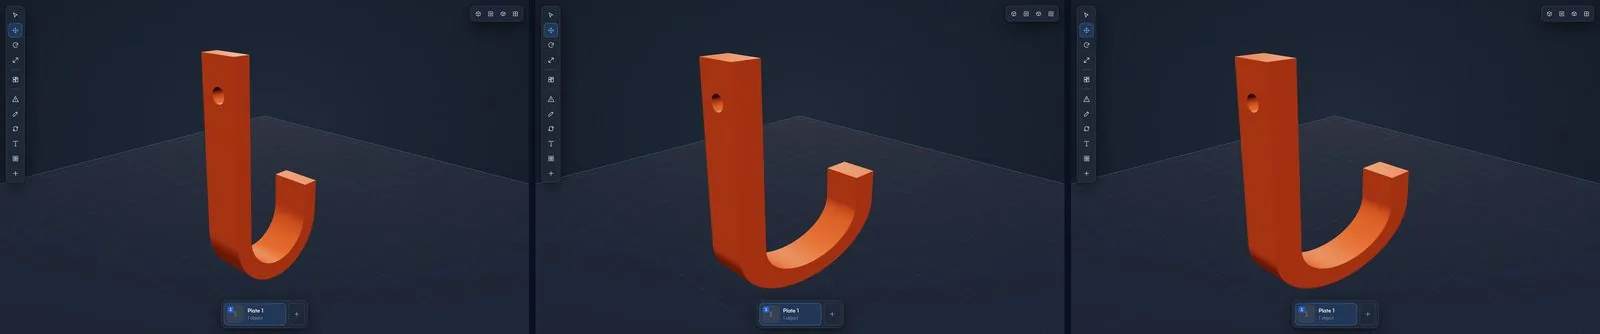
The Resizing docs cover the limits, such as how far a section can shrink, and what happens to text, paint and layer heights.
What this lets you sell
Once a new size is a number you type, one model can be a whole range: a bracket in three lengths, a tray sized to the customer's drawer, a sign as wide as the name on it. That's a size option on the listing instead of a "contact me for custom sizes" note, and custom sizes you can quote without a CAD session. In Printago, save each size to its own part and map them to your listing's options, and every order prints the right one.
Try Printago free, and see how to add screw holes and magnet holes that stay the right size when you resize.
More Printago Studio guides
Read the Printago Studio overview, or browse all slicer guides.
Frequently asked questions
Sign up for free today
No credit card required. Connect unlimited printers and get production automation running in minutes.