
How to Add and Paint Supports on a Chromebook
November 2, 2026
Add supports on a Chromebook in your browser, paint exactly where they go, and block them where you don't want them. Then check them layer by layer.
To add supports on a Chromebook, turn on Supports in a browser-based slicer such as Printago Studio. To paint them by hand, press L and brush over the model. Support painting normally lives in desktop slicers, which don't install on most Chromebooks, and a managed school device will often have the Linux environment blocked as well.
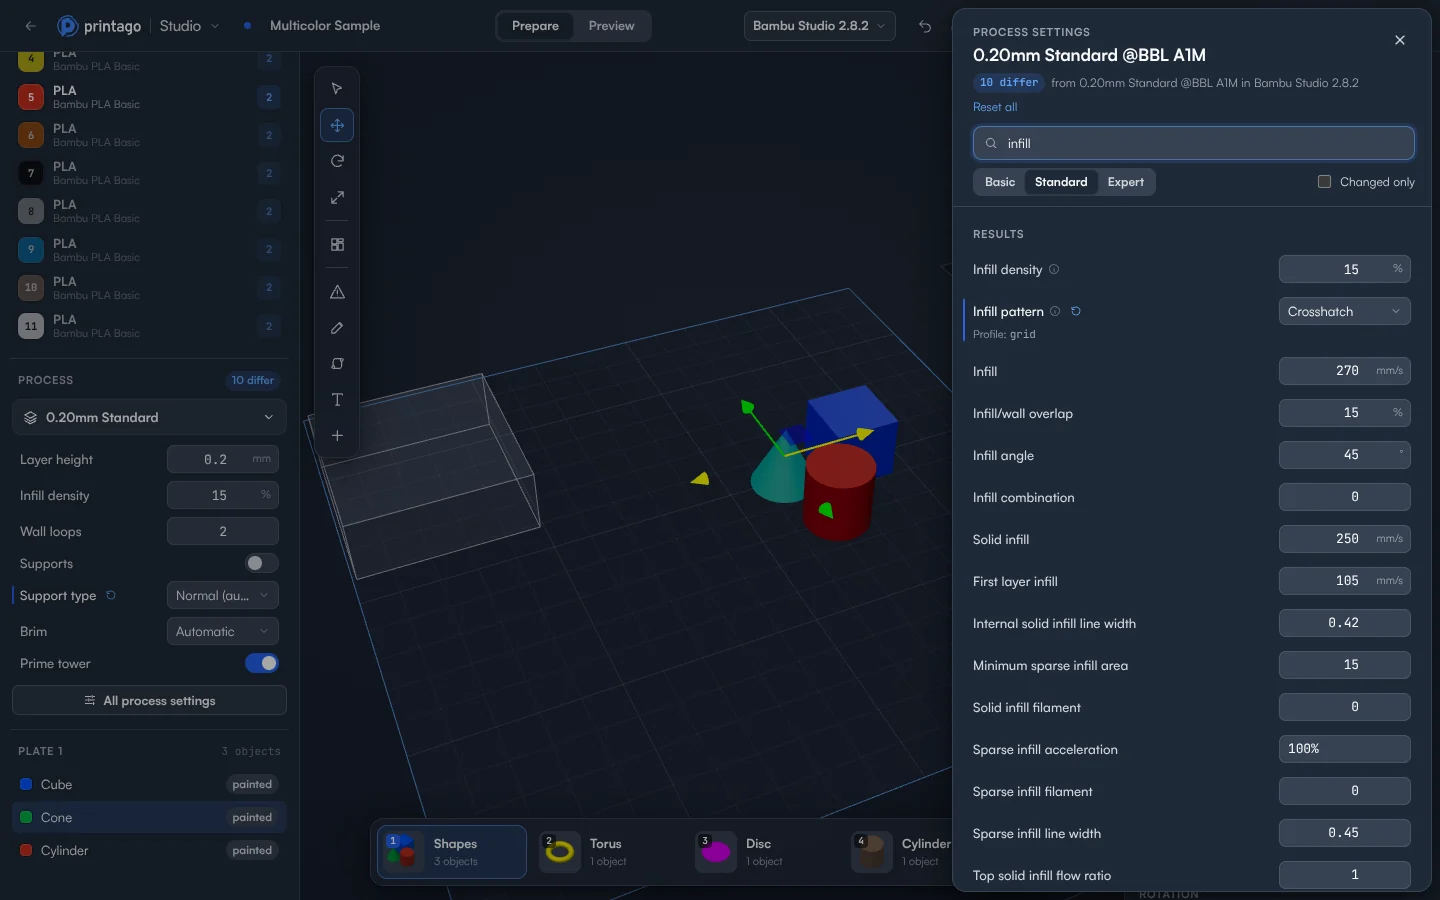
Turn on supports
- Sign in to Printago and open Printago Studio from the sidebar.
- Choose Open a local file and pick your model.
- In the Process section of the Setup panel, turn on Supports.
- Set Support type: normal or tree, automatic or only where painted.
- For the finer settings, open All process settings and go to the Support group.
To see where a model needs help before you slice, press Ctrl+L to show overhangs.
Paint where supports go
- Click Support paint on the toolbar beside the view, or press L.
- Click the object you want to paint, then drag across it.
- Choose what the brush does: Enforce always supports the painted area, Block never does, and Erase clears paint.
- Change the brush with Size. The ring under the pointer shows it. Smart fill paints a whole flat face with one click.
- Click × or press Esc to stop painting.
Each stroke is one step for Undo, so a slip costs you nothing.
Block or force supports with a shape
A shape is handy when you want a clean box of "no supports here".
- Click the object, then under Parts click + Add.
- Choose Support blocker to stop supports inside the shape, or Support enforcer to make them where it is.
- Choose a shape: Box, Cylinder, Cone, Sphere or Torus.
- Click the part in the list to set its Offset and Size. A No effect tag means it doesn't touch the printed object.
How do I check the supports before printing?
Click Slice plate 1, then open Preview. Under Color by, choose Feature. Supports get their own color and their share of the print time. Click other features to hide them and see the supports alone, and drag the layer slider to see where they meet the part.
Each slice uses cloud time. You get 60 minutes of cloud slicing and rendering time a month free, and more on a paid plan. Jobs sliced by your print queue don't count.
Why it's worth the extra minute
Supports cost filament and print time, and scars on a visible face can mean a reprint. Printago is 3D print farm software that runs production from order to finished print. File > Save to Printago keeps your setup on the part for every future print. Our Bambu Studio supports guide covers when to use each support style, and the docs list every control. When it looks right, send it to your printer.
Create a free Printago account and paint your first supports.
More Chromebook guides
Read the Printago Studio, or browse all slicer guides.
Frequently asked questions
Sign up for free today
No credit card required. Connect unlimited printers and get production automation running in minutes.