
How to Change Filament Color at a Layer on a Chromebook
November 2, 2026
Change filament color at a layer on a Chromebook, in your browser. Move the layer slider, add a filament change, slice again, and check the color bands.
To change filament color at a layer on a Chromebook, slice the plate in a browser-based slicer such as Printago Studio, move the layer slider to the layer you want, click +, and choose Change filament. You need the browser version because this control sits in the slicer's preview, and desktop slicers don't install on most Chromebooks. Many managed ones also lock out the Linux environment.
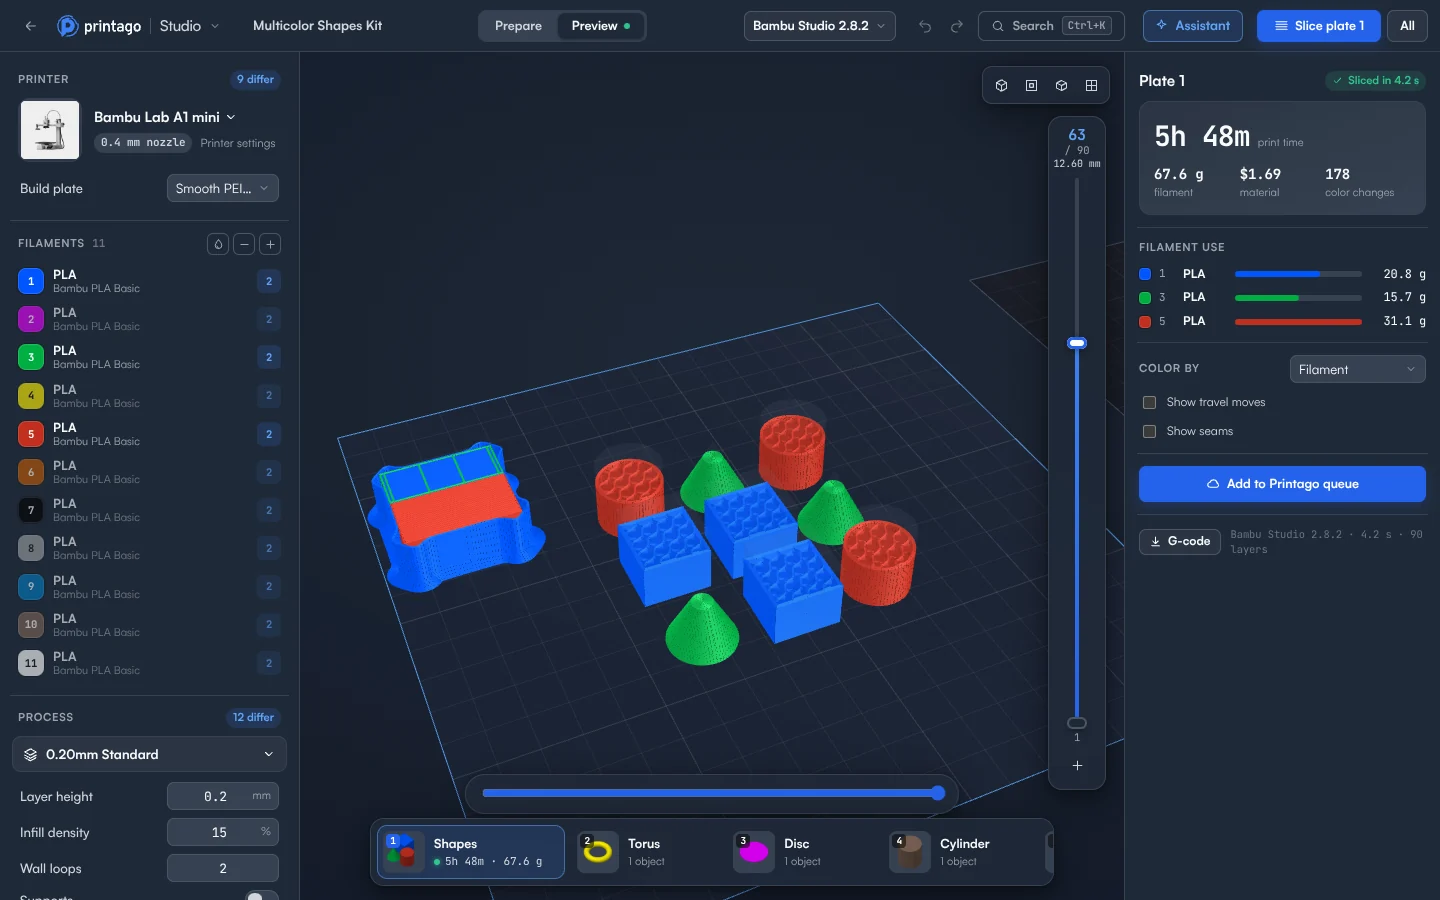
Add the color change
- Sign in to Printago and open Printago Studio from the sidebar.
- Choose Open a local file and pick your
.stlor.3mf. - Under Filaments, click + to add a slot for the second color. Click its numbered swatch to set the color and its material name to set the filament profile.
- Click Slice plate 1. Printago Studio switches to Preview.
- Drag the layer slider to the layer where the new color starts. ↑ and ↓ move one layer at a time, and the slider shows the layer number and height.
- Click + under the slider, choose Change filament, then choose the slot.
- Want a band? Move up to where it ends and add another change back to the first slot.
- Click Slice again so the G-code includes your changes.
- Under Color by, choose Filament and step through the layers to check the bands.
You can add several changes and slice once at the end, because the toolpaths stay on screen until you do. That helps, since each slice draws on your allowance: 60 minutes of cloud slicing and rendering time a month free, and more on a paid plan. Jobs sliced by your print queue don't count.
Manage your changes
Each change shows as a mark on the slider and a row in the At layers list in the right panel. Click a row's layer to jump to it, or × to remove it. A layer has at most one filament change.
What changes on the plate
- A prime tower appears. A filament change makes the plate print with more than one filament, so it gets a tower like any multicolor plate. With nothing selected, the right panel shows its X and Y position.
- Purge is adjustable. The drop button next to − and + at Filaments opens Flushing volumes. A lower volume saves filament and time but can leave a trace of the old color.
- Time and filament change. Check Print time and Filament use in the right panel after you slice again.
If it doesn't work
A row that says Missing, or a slice that stops with The engine didn't change filament at, means the engine skipped that change. On a printer profile where that happens, try the other slicing engine.
Why a color change earns its keep
A two-tone band can make one model into a second product, with no change to the model itself. Printago is 3D print farm software that runs production from order to finished print. When you queue the plate, you pick the material for each filament. For painting colors onto a surface, see the desktop guides for Bambu Studio and OrcaSlicer. The docs cover pauses and G-code at a layer.
Create a free Printago account and add your first color band.
More Chromebook guides
Read the Printago Studio, or browse all slicer guides.
Frequently asked questions
Sign up for free today
No credit card required. Connect unlimited printers and get production automation running in minutes.